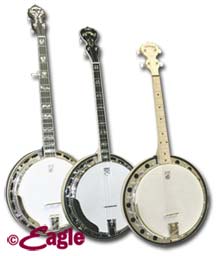
Deering Banjo Maintenance Manual
Notes written by Greg & Janet Deering …
Now that you own a Deering banjo, you will find that banjo maintenance will become a big part of your banjo-playing career. Just as a car needs the oil changed, and the engine tuned up now and then, so your banjo periodically needs to be tightened up and adjusted.
If you were to play your banjo without doing anything to maintain or adjust it, you would find that soon it could be losing it's original sound, picking up rattles, and becoming less enjoyable to play. Realize that your banjo is a delicate instrument. It can't be left out in the sun, or in a hot car, or taken out in freezing weather without considerable harm coming to it. If you want your banjo to retain it's value, you must maintain it. If you take good care of your banjo, it will become your lifelong friend and a treasure that you can pass on to future generations.
It isn't difficult to maintain your banjo, if you understand what needs to be done. There are things that you need to do after each playing and things that only need doing every few months, depending on how much you play. This maintenance manual will provide a thorough outline of what you can do to keep your banjo as nice as it was the day you bought it.
SPECIFICATIONS OF DEERING BANJOS
Banjo length: 39 1/2"
Neck Length: 26 1/2"
Neck Width at the nut: 1 1/4"
Truss-rod Nut: 1/4" hex
Scale Length from Nut to Bridge: 26 1/4"
Bridge: 5/8" Three footed maple-ebony
Head: 11" High Crown
Extension Nut: 10/24" x 3/4" x 5/16" Coupling Nut (Boston banjos only)
Bracket Nut: 1/4"
Coordinator Rod Nut: 15/16" Hex Nut National Fine, Use a 1/2" wrench
Banjo Case:
Bluegrass banjos - 13 1/2" resonator
Folk banjos - 11 1/2"
DAILY MAINTENANCE
- The continued good quality of your banjo is dependent on your daily efforts to maintain it. It is best to develop a routine to do every time you put your banjo away. For example:
- Wipe the fingerprints and smudges off the metal parts with a clean cotton rag; then run the cloth up and down the strings and fingerboard. If you don't wipe the metal parts off, the acid from your skin will react with the metal and tarnish or eat it away as time goes by. Keep a clean cloth in the case. (If you want a banjo that won't tarnish, have your banjo Chrome plated, the Chrome is resistant to the affects of the acid from your skin.)
Remove the capo, if you used one. The pressure of the capo against the back of the neck for long periods will eventually mar the finish.
- Set your banjo in the case carefully so that you don't bump the fifth peg. After several bumps the fifth peg might suddenly fall out.
The most important daily maintenance is to store your banjo in a hardshell case or delta case. This will protect it from being knocked around and insulate it against changes in humidity and temperature.
CLEANING
Both wood and metal parts should be cleaned and polished every three to six months or more often if needed to keep your banjo looking it's best.
FINGERBOARD CARE
To clean the fingerboard, rub it down with Fast Fret, then with a clean cloth rub the oil into the wood, not leaving any excess on the fingerboard.
If you practice 8-12 hours a day you will wear the frets out within a year. Don't worry - you'll just need new frets. The factory will do that for you at a reasonable cost.
If you notice grooves wearing into your fingerboard, one possible cause is playing with long fingernails. Keep the fingernails on your fretting hand clipped short.
If you notice grooves in your frets, this is normal wear and tear, however if it happens within a year you may be pressing harder than necessary when you fret the neck and may be creating more fret wear than normal. Try using a lighter touch.
FINISH
Waxing the finish of the neck and resonator protects as well as shines it. Use the Deering Wax Cloth which has wax in the cloth and is much neater and easy to use.
Very light scratches in the finish can be rubbed out using either "Meguiar's Mirror Glaze Auto Polish" or toothpaste, and a cotton cloth. Put some into the area of the scratch and rub it around so that the fine grit of the polish smooths the finish. It takes a lot of rubbing to get a banjo polished up. Deep scratches will need professional attention.
To protect the finish, avoid vinyl or plastics, such as simulated leather banjo straps which contain solvents that may react with the lacquer finish and mar it. Avoid commercial furniture polishes containing harsh chemicals or silicone which can eventually ruin the finish. If you spill water or alcohol on your banjo, wipe it off immediately because it can leave a cloudy spot.
HEAD
If you prefer a clean head, use "Formula 409" or similar cleaner and a white cotton cloth.
METAL PARTS
The metal parts have a thin outer coating of nickel, chrome or gold called "plating," which can be worn off. You can polish nickel or chrome parts with an automotive chrome polish, not cleaner, but it is easy to get polish caught under the hooks when you do this. So, we recommend that you use the Deering polishing cloth which has the polishing agent in the yellow inside cloth along with the preservative in the outer gray cloth which will protect the metal after you clean it. If you use an automotive polish don't use it more often than every 6 months to a year, and wipe off fingerprints daily in the meantime. You can use the Deering polish cloth to wipe fingerprints off daily without harming the plating.
Do not polish gold plating; wipe it off periodically with the grey polishing cloth only. Gold plating is easily worn off the armrest with normal use. If you get a gold plated banjo, plan to have the armrest re-plated periodically.
EFFECTS OF TEMPERATURE AND HUMIDITY
The survival of your banjo depends greatly on the environment you put it in. Made largely of wood, the banjo is easily affected by changes in temperature and humidity. Deering aims to keep the factory at about 70-77 degrees Fahrenheit and 35%-45% humidity, and these are the optimum conditions for your banjo.
It is important then, that you take all possible steps to maintain your banjo at room temperature. A rapid change in temperature, or exposure to cold can create cracks in the finish called "lacquer checks" that are not repairable under the warranty.
If you must take your banjo out in freezing temperatures, keep it in the case. When you bring it inside, let it sit in the case so that it can come up to room temperature slowly.
Allowing your banjo to become too cold or hot invites a crack or warp in the wood. Heat, as is often found in a closed car on a hot day, can soften or blister the lacquer and change the contours of the wood, causing the neck or resonator to warp.
Humid weather increases the moisture content of the wood, causing it to expand or swell. A gradual increase in humidity won't generally do permanent damage; but high humidity in combination with high temperature can weaken glue joints or even open them up.
A skin head tends to expand or loosen when the humidity rises, and tighten when the humidity drops, considerably affecting the sound of the banjo. If you tighten a skin head when the humidity is high and then a dry spell comes, the head may split when it loses moisture and shrinks. Plastic heads, as usually found on banjos today are only affected by heat, which softens the plastic and causes it to stretch or loosen easily. For this reason, it is best to tighten the head under average weather conditions for your area.
Humidity will also affect the curve in your banjo neck. It will arch back when the weather is dry and bow up when the humidity is high. A truss-rod adjustment will compensate for this. See the section on Truss-Rod adjustments.
Sudden drops in local humidity are the most dangerous weather changes for a banjo. The moisture content of the wood is forced down in a hurry and portions of the wood shrink faster than others, causing cracks and opening joints. Watch the weather reports and guard against dry spells. You should keep a case humidifier in the case.
As you become adjusted to adjusting your banjo, you will find that a couple of minutes now and then, making the needed adjustments, will improve the sound immensely. General use and weather changes will cause your banjo to need a good tune-up now and then. It is to your advantage to become proficient at making adjustments from the start.
PROTECTING AGAINST TEMPERATURE AND HUMIDITY
The easiest way to control the humidity is by storing a banjo in a hardshell case or delta case when you're not playing it. Don't hang it on the wall, leave it leaning against a couch, or set it next to a source of dry heat. You can control the smaller body of air within a good case much more easily than the air in the entire house.
A trick guitar players use to maintain the humidity in their guitar case is to put half a potato in the string compartment, wedging the compartment open slightly, so that the potato will give off a slight amount of moisture as it dries out. The potato must be replaced periodically. A neater way is to place a plastic soap container with holes drilled in it and a damp sponge inside it in the string compartment in place of the potato; or purchase a humidifier for your case. A case humidifier is best. Potatoes get a bit ripe and we don't recommend them - but it makes a good story.
TRAVELING WITH YOUR BANJO
If you plan to take your banjo with you on a trip, there are several precautions to ensure its safe arrival at your destination.
The first and most basic precaution is to take it in a hardshell case or delta case. This will protect it from the dents and bruises it might get in a less substantial case. Both cases have their unique advantages.
The hardshell, traditional banjo case has a rigid exterior which protects well against pressure on the instrument and fits into compact areas as well as a banjo can, but if a banjo is dropped the heavy end usually hits first and the neck may whiplash inside of the case. When the neck hits against the hard exterior, the case can snap off the peghead or break the neck at the heel - putting padding at the heel of the neck where it meets the resonator and on both sides of the peghead can help protect this.
The Delta case is designed with a different concept in mind, it has a wood frame and a plywood top and back. The inside of the walls of the case are filled with foam so that the case will give and so it absorbs the shock. The banjo doesn't take the impact. It also has pads built in to support the peghead and a long neck support. Although it is slightly larger than a traditional case, it is not heavier. The large exterior pocket gives you room for music books and it also has a large inside storage compartment. It comes with a shoulder strap which you can attach if you want to carry it over your shoulder. The cordura exterior is water repellant and resistant to nicks.
If you are traveling by car, pack your banjo inside the car, not in the trunk where it might cook or freeze. Keep it in the case, and cover the case with a blanket so that the banjo isn't in direct sun.
Air travel is popular these days, and it is not uncommon for airlines to break musical instruments. The most important factor to watch for to ensure that your banjo arrives safely is to avoid conveyor belts. If your banjo gets knocked off a conveyor, damage is guaranteed.
Most airlines in the United States automatically insure all your bags together for $1200.00, if the value of your instrument and your other bags exceeds this amount you may want to purchase additional insurance from a private broker before your trip. Some airlines have had trouble with instrument breakage and my not insure your banjo, they may request that you sign an insurance waiver before they will check your banjo.
When you call for reservations, tell the airline's personnel that you are bringing a banjo with you. Ask about the insurance and whether you can carry your banjo onto the plane with you. If the plane is a large one (e.g., 747, 727, L10, L11) there may be a closet large enough for it in the passenger section or it may fit into the overhead compartment. If the plane is a smaller one, you may have to buy a second seat at half fare.
In any case, whether you buy a half-fare seat, carry your banjo on with you, or check it as baggage, tie your case closed, so the latches won't get bumped open, and carry it to the steps of the plane with you. Whether your banjo gets onto the plane with you or gets checked as baggage largely depends on the flight attendant's assistance in finding room to store it in the passenger's section. If there is no room for it, it will be hand-carried to the baggage compartment from there. At this point, your only problem is to ensure that you get your banjo back before it is put on a conveyor belt after you land. Get a flight attendant's assistance in arranging this.
CAUTION ABOUT DOING YOUR OWN ADJUSTMENTS
Before you start tinkering with your banjo, there is something you need to think about. What happens if you break the truss-rod, a hanger-bolt or something? This is not uncommon when someone completely new to banjo adjustments starts tinkering with his/her banjo.
A reputable repairman usually guarantees his work and repairs any mistakes he makes, or replaces the instrument if he breaks it. If you break it, however, you will suffer the loss.
We recommend that before attempting any adjustments, you read this manual carefully, and take your banjo to a reputable repairman. Watch him work on it and ask questions. So that next time, you will be more familiar with how to do the adjustments yourself.
TIGHTENING THE HEAD
Your banjo should have a tight head in order to have its clearest tone. It should not be too tight or the bass notes will be stifled.
Tighten the head with a 1/4" bracket wrench.
Tighten each hex nut just a fraction of a turn, going around the rim several times, keeping the tension hoop level, until they are all tight. You may get to a point where the hex nuts squeak when you tighten them, indicating the head is getting very tight and you should be leery of tightening further, but you can continue some past this point.
BROKEN HEAD
The head is broken if no matter how much you tighten, some of the j-bolts aren't getting as tight as others, if the head will not tighten, or obviously, if it is ripped. This doesn't mean that anything is wrong with your banjo, heads do wear out. A head can get brittle with age, so replacing a broken head is just part of owning a banjo. A banjo head has no set life-span.
CHOOSING A NEW HEAD
Banjo heads come in many sizes, in increments of about 1/16" from ten to twelve inches in diameter. You can choose from clear head, translucent heads, fiberskyn heads, heads frosted on the bottom side, ebony heads or reflective gold and chrome heads. Different kinds of heads will affect the sound in different ways.
An unfrosted head gives a thinner, crisper sound than a frosted head. You many need to apply wax or bow rosin to the feet of the bridge on an unfrosted head to reduce bridge slip.
In buying a new head you will also need to specify "high" or "low" crown, which is the distance from the band of the head to the flat surface of the head and determines how much the tension hoop has to pull on. Deering banjos are designed to fit a high crown eleven inch head.
CHANGING THE HEAD
If you're not confident in your ability to change the head correctly after reading this section, please have a qualified repairman do it for you while you watch, so that next time you will be prepared to do it yourself. Don't get yourself into Oakie's position!
Remove the strings, resonator, tailpiece, armrest and bridge. Take note of how the tailpiece was adjusted, so you can replace it where it was.
** Do not remove the neck; you may have trouble aligning it correctly again.
Loosen all the bracket nuts with a bracket wrench, then unhook the j- bolts from the tension hoop, leaving the j-bolts attached to the rim.
Remove the tension hoop and head. Be sure to note how the tension hoop was lined up so you can replace it correctly. Boston tension hoops have a seam that goes under the tailpiece. Notched tension hoops have a specific spacing of the notches to allow for the neck and tailpiece.
Clean all the parts.
Put on the new head. You can put a little oil or paraffin around the top of the tonering or steel rim to lubricate it before you push the head on.
Put the tension hoop on over the head, making sure it fits evenly around the rim; no one side should be higher than the other.
Hook the j-bolts back over the tension hoop, first anchoring 4 bolts evenly spaced around the rim, and then filling in the rest of the j-bolts, just finger-tightening them.
Tighten the pot screws (on all Basic and Intermediate Deering banjos) with a screwdriver before tightening the head. Keep the shoes straight.
To tighten the head, start on one side of the neck, and tighten each bracket nut with the bracket wrench only half a turn, going around the rim several times until the head becomes tight. (See section Tightening the Head for how tight.)
Re-attach the tailpice.
Put the armrest back on by setting the pot of the banjo on your lap sideways with the position for the armrest on top. Slip the armrest plates under the appropriate j-bolts and, if necessary, wedge them them there using a couple of popsicle sticks while you put the armrest on. Set the armrest in place, over the armrest plates and aim the screw through the hole in the armrest to the hole in the plate. When the screw catches the plate, tighten it.
String the instrument up.
CHOOSING NEW BANJO STRINGS
You may want to experiment with different gauges of strings to get the sound you want. Heavier strings give a louder, more solid sound and don't vibrate as much as light strings. If you are a strong picker, heavier strings, though tougher on the fingers, will not be as prone to buzzes as light-gauge strings.
Buzzing is caused when a string vibrates against a fret. The harder you pick, the more likely that a light-gauge string will vibrate enough to hit a fret. But technique also comes into play here, if you get the string to vibrate parallel with the fingerboard you can do amazing things without causing buzzes.
Good quality strings are essential to good tone. Don't sacrifice your banjo's tone by trying to save a few pennies on strings.
Eventually you will learn to recognize when your strings have lost their responsiveness. You can also see if you need new strings by running your finger along the under-side of the string, checking for pits or grooves worn into the strings by the frets.
Strings should be changed a minimum of every couple of months minimum if the banjo is played in moderation, and once every couple of days if it is played a lot. Old, worn, or corroded strings are a major cause of poor banjo sound.
CHANGING THE STRINGS
The following sequence of steps will ensure that the bridge remains in the correct position and your banjo stays in tune while changing the strings.
We recommend that you lightly mark the position of the bridge in pencil on the head, in case the bridge falls over or is knocked out of place while changing the strings. This will save time in repositioning the bridge.
Take one string off.
Rub pencil lead or a drop of oil into the nut slot to allow the string to slide more easily when going into tune.
Re-tune the new string to the other strings on your banjo.
Continue the steps 1. through 3. for each successive string.
HOW TO THREAD STRINGS
The proper tuner for each string is shown. The string is passed through the string hole near the top of the string post from the center of the peghead toward the edge of the peghead.
The string is wound around the post in a direction away from the center of the peghead. Pass the free end under the attached string so the first wind is around the post above the string end.
The free end is then bent up and the string continues to be wound around the tuner post in the same direction so the next wind goes under the string. This way the string is clamped between two winds and will not slip. A string should pass around the shaft at least two full winds to clamp it.
If you don't like getting pricked by short string ends, then before you clip the string off take the end and pass it back through the tuner hole looping it back on itself, pull it tight and clip the string next to the tuner post. The string end will slip back inside the tuner post and will not have a stray end sticking out.
THE BANJO NECK
There are two schools of thought on banjo necks. Some think a banjo neck should be should be completely flat to be correctly adjusted. We have applied a new innovation to banjo neck building, actually derived from old-world guitar craftsmen.
A Deering neck, correctly adjusted, has a slight curve in the fingerboard. A curved fingerboard allows the strings to meet the frets at the same angle all the way up the neck. This allows for lower action without buzzing than is possible with a flat fingerboard.
** THE TRUSS-ROD TEST --- A Deering neck should have 1/64 of about .015 - .020" clearance between the top of the 7th fret and the bottom of the string when you capo the 1st fret and hold the string down at the 22nd fret at the same time.
** THE ACTION TEST --- Measure the clearance between the top of the 22nd fret and the bottom of the strings. Low action is about 1/8" clearance, any lower is too low. Many professional pickers prefer their action at 1/4" clearance.
Low action is not necessarily desirable because if you pick hard, low action can cause buzzes by not providing enough space for the string vibrations. Hammer-ons and pull-offs are clearer with higher action.
Neck adjustments are used mainly to adjust action and to correct buzzes, for specifics see the Trouble Shooting Section.
TRUSS-ROD ADJUSTMENTS
The truss-rod is used to adjust the curve of the fingerboard. Deering truss-rods provide a completely adjustable neck which can be adjusted to arch back, be completely flat, or bow up.
All truss-rod adjustments should be done with the banjo strung up and tuned.
TO ADJUST THE TRUSS-ROD:
Get a truss-rod wrench for Deering banjos which is a 1/4" deep socket wrench or 1/4" nut driver. (Hardware stores sell them.)
Take off the truss-rod cap.
Use a pen to mark a line on the truss-rod nut and the wood around it; then you can measure how much you have turned the nut.
Set the banjo on a table with the peghead toward you and the neck extending away from you.
When you are looking at the truss-rod nut in this position:
Turning the truss-rod nut CLOCKWISE TIGHTENS IT - arches the neck back or flattens bow.
Turning the truss-rod nut COUNTER CLOCKWISE LOOSENS IT - puts more bow into it.
When turning the truss-rod nut, be sure to turn it just slightly, about 1/8 to 1/4 of a turn. Then do the Truss-rod Test to see if the neck curve is correct. Keep turns to a minimum.
Recheck the Coordinator Rod Adjustment.
CAUTION: If you do this adjustment yourself, keep in mind that if you are not careful you can break the truss-rod, making the neck worthless.
COORDINATOR ROD ADJUSTMENTS
The coordinator rod's main function is to firmly anchor the neck to the rim, making the banjo a stable unit. The rod can also be used for action adjustments.
Use a nail or Allen wrench to hold the lower rod still by passing it through the hole in the coordinator rod while you adjust the nuts. If you let the rod turn when making the adjustment, it may loosen the neck joint, in which case, you will need to tighten the rod back up to the hanger-bolt to keep the neck joint tight before continuing to adjust the nuts.
The upper rod is not used to make the adjustment; however you need to loosen the nut on the upper rod before you make the adjustment and tighten it snugly after the adjustment is made.
Using a 1/2" open end wrench, turn the nuts to adjust the action while holding the lower rod still with a nail.
TO LOWER THE STRINGS loosen the nut on the inside of the maple rim and tighten the nut on the outside of the rim.
TO RAISE THE STRINGS loosen the nut on the outside of the maple rim and tighten the nut on the inside of the rim.
Turn the nuts only a 1/4 of a turn at a time and then check the action. Over-turning the nuts can break the rim, strip the hanger- bolt, or pull the hanger-bolt out of the neck. Make sure all nuts are snug when you are done.
See the Trouble Shooting Section for specifics on Action Adjustments.
NECK ALIGNMENT TO THE RIM
On a Deering banjo with a maple rim and bell bronze tone ring, the neck alignment to the rim is carefully set at the factory and is not designed to be easily tampered with. If you feel some adjustment is necessary, have an experienced repairman do it.
THE LOOSE NECK
A loose banjo neck will detract considerably from the sound of a banjo because the instrument is no longer one solid unit and the vibrations are not able to carry through the instrument properly.
A banjo neck can become loose due to carlessness in adjusting the co-ordinator rods by allowing the rods to turn when adjusting the nuts. This is why a nail is inserted in the hole in the rod to hold the rod from turning when adjusting the nuts to change the neck angle on upper-line banjos.
It is possible for the extension nuts to work their way loose in time on the Boston banjo. If the neck is loose, it simply needs to be tightened up. Use a 5/16" bracket wrench to tighten the extension nuts which hold the neck on if needed.
To tighten the neck on a tone-ring banjo screw the co-ordinator rods tighter to the hanger-bolts which attach the neck to the rim.
To do this you:
Loosen the co-ordinator rod nuts on both rods.
Make sure the neck is lined up properly with the tension hoop.
Place a nail through the hole in each rod and turn it tighter to the neck.
After the rods are again holding the neck on tight, adjust the coordinator rod nuts to re-set the action. See Coordinator Rod Adjustment Section.
Re-check the truss-rod adjustment.
BOSTON BANJO - ACTION ADJUSTMENTS
The Deering Boston banjo has a slightly different neck adjustment because it does need and so does not have coordinator rods.
The neck attaches to the rim through oblong holes so you can move the neck up or down on the rim by loosening the extension nuts (inside the rim) and slide the neck up or down. This adjustment can be used to lower the action by setting the fingerboard slightly higher in relation to the rim. However, if the neck already sits high in relation to the rim, you can move it down to raise the action. But you must be sure that the fingerboard sits, at minimum, slightly above the level of the tension hoop and head.
The Boston banjo rim is made of 3/16" thick steel which rings beautifully and doesn't need stabilizing. It has no rod because you can't bend the rim to adjust the neck anyway. Instead, you can use the oblong holes in the rim for adjusting the neck up or down by loosening the extension nuts that hold the neck on and simply sliding the neck up or down. This excellent design gives you the adjustability you need along with the driving sound of a steel rim.
THE BRIDGE
Bridge placement is critical in getting the best possible sound from your banjo. There is a specific place on the head where the bridge should sit for correct harmonic adjustment.
Your banjo was set up at the factory to take a 5/8" bridge and the neck alignment is based on this bridge height. Do not try to adjust the action by lowering the height of the bridge.
The size and design of the bridge will affect the sound of your banjo. Lowering the bridge creates less pressure on the head and a sound loss results, the banjo becomes less responsive and even muddy sounding.
Thinning the bridges reduces the weight and mass of the bridge to create a thinner, crisper or less bass sound. Thinning the bridge too much can weaken the bridge.
When curing buzzes in an old bridge or putting on a new bridge, take a V-file and V-groove the bridge slots with an angle downward toward the tailpiece so that the string makes contact right at the face of the bridge
HOW TO SET THE BRIDGE
- For an approximate setting, place the bridge perpendicular to the strings - 26 3/16" from the nut, in spite of the 26 1/4" fret scale length, because strings do not vibrate according to the exact calculations of physics.
- To get the bridge set exactly, use harmonics:
On the first and fourth strings, play the 12th fret harmonic by lightly touching the string above the 12th fret while plucking the string. This should ring clearly, and is called "chimes."
Now play that string again while fretting the 12th fret right behind the fretwire. These two notes should be the same if the bridge is in the correct place.
If they aren't the same, move the bridge:
AWAY from the NECK if the fretted note is HIGHER than the harmonic note.
TOWARD the NECK if the fretted note is LOWER than the harmonic note.
It is important to set the bridge exactly. If the bridge is as little as 1/32" out of place a large amount of sound quality is lost.
TAILPIECE ADJUSTMENTS
The only adjustment on the tailpiece is via a screw which adjusts the tailpiece up or down toward the head, affecting the string tension on the bridge.
For a crisp tone the tailpiece should be close to the head. Higher adjustment gives a more mellow tone. Where you set the tailpiece is up to you. A good approximate setting is 1/8" off the head.
Always be sure that the tailpiece is anchored firmly to the tension hoop so it doesn't rattle.
TUNERS
Planetary pegs have a screw or a knob at the button end of the peg which is for tightening the tuner. If a tuner slips out of tune, just tighten it so it doesn't slip.
Be careful not to bump the fifth peg when handling your banjo or putting it into the case. After several bumps the fifth peg can become loose and will suddenly fall out. If this occurs just put it back in firmly. If it falls out again, use "Tight Bond" to glue it back in.
Note - You are better off with a set of guitar tuners like the ones we put on the Boston banjo than with a cheap set of imported planetary pegs. Guitar tuners have a higher gear ratio (6-1) than planetary tuners (4-1).
Good quality imported planetary pegs cost about the same as domestic planetary pegs. If you really want the look of straight through banjo tuners, it is worth spending the money to get good ones.
IMPROVING BANJO SOUND
A great sounding banjo is not an accident, it has been set up and tuned in, just right.
The banjo, more than any other stringed instrument, must be correctly adjusted to bring out its best tone. Each adjustment is important to the overall sound of the banjo.
Miraculous results are obtainable when an unkept banjo is readjusted.
If your banjo doesn't have the magic it once had, you'll find this checklist helpful in restoring its original life.
- New strings
- Hardware tight, no rattles
- Neck tight to the rim
- Head tight
- Tuner screws tight
- Bridge in place
- Tailpiece set
- Neck curve correct, truss rod
- Action set, coordinator rods
- Tuned to pitch
BUZZES -- WHAT DO YOU DO?
First check the strings to see if you need to replace them. If you aren't sure, put on a new set.
Check the action, using the Action Test (in the Banjo Neck Section). If the clearance is less than 1/8", it is too low. See Coordinator Rod Adjustment Section to raise the strings.
If the action is okay, do the Truss Rod Test. (Banjo Neck Section).
To double check, fret the neck and pick the string, while listening for buzzes all the way up the neck. Note which frets are buzzing.
If you have buzzes in the first five frets, loosen the truss-rod.
If you have buzzes in the sixth to tenth frets, tighten the truss- rod.
Before making this adjustment, see the Truss-Rod Adjustment Section.
Fret the neck at the first fret. If it still buzzes, check the bridge. A bridge buzz sounds like an annoying twang. See The Bridge Section for handling.)
If the neck buzzes unfretted but doesn't buzz when fretted on the first fret, the problem is the nut.
Deering nut slots are cut with special tools and procedures at the factory. You only run into nut problems if someone has tinkered with your banjo.
Is the nut slot too wide? If so, loosen the string and lay a piece of paper across the string slot. Put the string back over the slot and tighten it so that it pulls the paper down into the slot. Tear all excess paper off, leaving only the paper in the slot to fill the excess space temporarily , until you get a new nut.
There must be a highest point in the string groove which breaks the string vibrations at the edge of the nut by the fingerboard, or the string will buzz in the nut slot. If this is the problem, seek professional help.
The bottom of the string should be 1/16" above the fingerboard at the nut. If it is lower than this, the nut slot is cut too deep. Give it to a repairman to fix.
If you have gone through all of the above steps and still have buzzes, then the problem is with the frets.
Expansion and contraction of FINGERBOARD wood due to changes in humidity can cause the frets to loosen and raise up, and the strings to buzz on high frets.
Frets will wear down with use, and buzzing can occur when pressing the string on a worn fret if the next fret down the fingerboard toward the head is not also worn.
To check the frets, lay a six inch ruler or straight edge on top of them and see if it rocks. If it doesn't lay flat on three or more frets, seek professional help.
Note: If you are near the factory, you can bring your banjo in for a check up. Greg Deering gives the best adjustments in the world.
ACTION TOO HIGH - WHAT DO YOU DO?
Check the bottom of the heel. If it is pulled away from the rim, see the section "The Loose Neck".
If the neck won't pull tight to the rim, the hanger-bolts are stripped. Hanger-bolts can strip out if the coordinator rods have been cranked too tight. Seek professional help.
Do the Truss-Rod Test. If the neck has too much curve, adjust the truss-rod as described in the Truss Rod Adjustments Section.
If the truss-rod adjustment is correct, adjust the coordinator rods to lower the action. See the Coordinator Rod Adjustment Section.
If you have adjusted the coordinator rod within their limit and the action is still too high, a factory authorized repairman will have to reset the neck. This should be necessary only if your banjo has been tampered with.
ACTION TOO LOW - WHAT DO YOU DO?
Action lower than 1/8" is too low. Do not alter the bridge height to change the action.
Tighten the head, if it is loose. A loose head will sag and create even lower action. (See Tightening the Head Section.)
Do the Truss-Rod Test. If the clearance is too low, see the Truss-Rod Adjustments Section.
Adjust the coordinator rods. See the Coordinator Rod Adjustment Section.
If this doesn't do it, seek professional help.
MAKING YOUR BANJO SOUND LIKE YOUR FAVORITE PRO'S
Many pickers buy the same kind of banjo their favorite professional plays and can't figure out why their banjo doesn't sound like his/hers.
The reason is largely in the adjustments. How is his/her banjo adjusted?
Things you need to know about his/her banjo are:
- Is it constructed the same as yours? Same wood, tone ring, etc.
- How tight is the head?
- How high is the action?
- What kind of tailpiece?
- What kind of bridge?
- What kind of head?
- What gauge of strings?
All of these variables will affect the sound of a banjo. In addition to banjo adjustment, personal ability has a lot to do with banjo sound. To make a banjo sound like Earl Scruggs' banjo, you've got to play like Earl Scruggs. We estimate that 55% of the sound of the banjo is the artist. The more you practice, and improve your playing, the better your banjo will sound.
THE CROSSFIRE, ELECTRIC BANJO
The Crossfire is a new breed of banjo, designed specially to meet the needs of modern musicians who play the banjo along side of electric guitarists and need an instrument which is compatible with modern amplification systems.
Many of the banjo adjustments covered in the previous pages apply equally to the Crossfire: the Head, Changing the Strings, The Banjo Neck and Truss-Rod Adjustments, The Bridge and How to Set the Bridge, and Tuners are all the same as for an acoustic banjo.
What is different is the Crossfire does not have coordinator rods for adjusting the action. The action can be adjusted like on an electric guitar, with shims under the neck joint.
Medium strings have more substance to them and usually work best with the Crossfire because the pickups under the head are magnetic pickups and amplify the vibrations of the strings as well as pick up from the metal shims on the feet of the bridge.
The L shaped compartment on the back of the Crossfire houses the circuit board for the active electronics and the battery. If your Crossfire starts sounding funny, becomes inter mitten or puts out no sound at all, the battery is dead. Simply replace the 9 volt battery. Don't leave the instrument plugged in at the jack. A cord plugged in at the jack acts as a switch for the battery and will drain the battery.
The square compartments house the pickups. You can adjust the pressure of the pickups on the head by adding or taking inserts out of the pickup compartment. The more pressure the pickups place on the head the louder you can get the volume without feedback.
In amplifying the Crossfire we recommend either a keyboard amplifier or a good amp with a horn in it. A guitar amp is not adequate because the frequency response range is limited to the range a guitar puts out and doesn't handle the banjo highs.
If you are recording or performing through a very large sound system you can plug in straight into the board and you will find that this works best. The Crossfire puts out a much cleaner signal than an acoustic banjo with a pickup on it.
If you get a lot of noise, you first need to check the ground on the instrument. There should be a wire soldered onto the tailpiece which grounds it. Neon lights can also create interference with the signals, so avoid standing close to neon or florescent lights.
You can make an appointment to have your instrument adjusted at the factory.
IN CLOSING
There are several major banjo publications you can use as resources:
* Banjo Newsletter, P.O. Box 3418, Annapolis, MD 21403-0418 * 5-String Quarterly 8407 Loralinda Dr., Austin TX 78753-5844 * Bluegrass Unlimited, Box 111, Broad Run, VA 22014 * The Resonator, P.O. Box 101025, Pittsburgh, PA 15237 * Fretted Instrument Guild of America, 190 Berwick Drive, N.E., Atlanta, GA 30328 * Banjoist's Broadsheet, 93 Redhatch Drive, Earley, Reading, England Rg6 2QN * British Banjo Circle, PO Box 10, Henley on Thames, Oxon, England RG9 5QF U.K.
Each of these publications will put you in touch with part of the banjo world. From them you will gain advice, insight and information which will enrich your banjo playing considerably.